How to String Beads: A Practical Guide on How to String Beads for Jewelry Tailored for Young Professional Women
Making your own jewelry is a fun way to express yourself. Learning how to string beads helps you create unique pieces that match your style. This skill not only adds flair to your look but also helps you take care of your jewelry collection. In this guide, we will show you how to string beads and share tips for keeping your beautiful creations in great shape.
Bead Stringing Basics – Setting the Foundation for Jewelry Making
Key Takeaway: To create beautiful jewelry, start with the right tools and materials. This ensures a professional look and helps avoid common beginner mistakes.
When you want to learn how to string beads, it’s essential to gather the right supplies. Here are the basic tools and materials you’ll need:
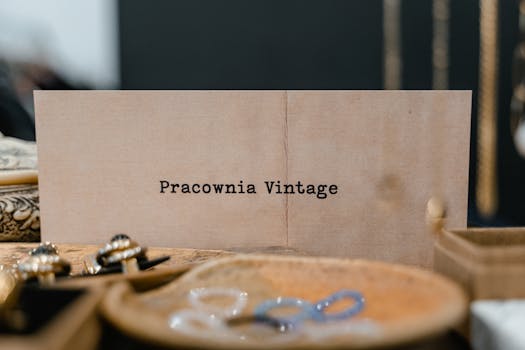
- Various Bead Types: Choose from glass, wood, or metal beads. Each type offers a different look and feel for your jewelry.
- Stringing Wire or Thread: Use strong, flexible wire for durability. Nylon thread is another option, especially for lighter beads.
- Clasps: These are essential for finishing your jewelry. Choose a style that matches your design, like lobster clasps or toggle clasps.
- Specialized Tools: Invest in a bead board for design layout, pliers for bending wire, and scissors for cutting thread.
Understanding these materials helps you learn how to string beads for jewelry effectively. The right supplies not only improve the final product but also make the process easier. (Think of it as using the right kitchen tools to whip up a delicious meal!)
Pain Points Addressed:
- You may feel confused about which materials to choose. Start simple and build your collection over time.
- With so many options, it can be overwhelming. Focus on a few types of beads and gradually explore more as you gain confidence.
Actionable Tip: For beginners, consider buying a starter kit that includes the basic tools and supplies. Websites like Amazon or local craft stores often have great options.

Step-by-Step Guide – Mastering How to String Beads
Key Takeaway: Follow these steps to create your stunning bead jewelry. Each step is important for achieving a polished look.
Now let’s dive into a detailed, beginner-friendly process on how to string beads for jewelry. Here’s a step-by-step guide:
Design Visualization and Pattern Planning: Start by thinking about your design. Sketch it out or use a bead board to lay out your beads. This helps you visualize the final piece before you start stringing.
Securing Beads and Knotting Techniques: When you start stringing, add a knot at the end of your wire or thread to secure your first bead. As you add more beads, consider using knots between them to keep them from sliding around. This adds an extra layer of security.
Adding Closures and Ensuring Durability: Once you’ve reached the desired length, it’s time to finish your piece. Attach the clasp by securing it to the ends of your wire or thread. Make sure to double-check the strength of your knots and connections. This ensures your design lasts through everyday wear.
Pain Points Addressed:
- Keeping beads in place can be tricky. Knots or using a bead stopper can help keep them from sliding as you work.
- You want your designs to last. Double-knotting and securely attaching clasps will make a difference in durability.
Actionable Example: Take inspiration from a young professional woman who transformed her style with handmade bead jewelry. She started with simple designs and found a unique way to express her personality. Her confidence grew as she wore her creations, making her feel more stylish and individual.

Advanced Techniques & Creative Patterns
Key Takeaway: Once you master the basics, explore advanced techniques to elevate your jewelry collection. Stand out with unique designs that reflect your personality. For this, familiarize yourself with the essential beading tools for jewelry making to enhance your skills further.
Now that you know the basics, let’s talk about advanced techniques. Here are some creative ideas to help you move beyond simple designs:
- Layered Bracelets: Create a stack of bracelets in different colors and textures. This adds depth to your look and allows for personal expression.
- Statement Necklaces: Use larger beads and unique patterns to create eye-catching pieces. Mixing different bead shapes and sizes can make your necklace a conversation starter.
Feeling stuck with basic designs? Experiment with color and texture. You can mix matte and shiny beads or combine different materials. This keeps your jewelry fresh and exciting.
Pain Points Addressed:
- You might feel like you’re stuck with basic designs. Keep pushing your creativity! Sometimes, just changing a bead type can inspire a new look.
- Unique pieces help you stand out in a busy professional lifestyle. A bold statement necklace can make a simple outfit pop.
Actionable Tip: For inspiration, consider downloading patterns or watching video tutorials. Many online platforms offer free resources to help you learn advanced techniques.

Caring for and Maintaining Your Beaded Jewelry
Key Takeaway: Taking care of your jewelry is just as important as making it. Proper maintenance keeps your pieces looking beautiful for years.
Caring for your beaded creations helps maintain their beauty and ensures they last. Here are some essential maintenance tips:
Cleaning and Storage Best Practices: After wearing your jewelry, gently clean it with a soft cloth to remove any dirt or oils. Store your pieces in a cool, dry place. Consider using a jewelry box with separate compartments to avoid tangling and scratching.
How to Repair Minor Breaks in the Bead String: If a string breaks, don’t panic! Gather the beads and re-thread them onto a new string. Use the same knotting techniques mentioned earlier to secure them in place.
Knowing how to string beads and how to string beads for jewelry is crucial, but caring for your pieces is equally vital. Regular maintenance keeps your jewelry looking new and prevents costly repairs.
Actionable Tip: Create a checklist for periodic jewelry maintenance. Set reminders on your phone or calendar to clean and check your jewelry every few months.
Incorporating these tips into your routine ensures your bead jewelry stays in top shape. Just like you schedule regular haircuts (because no one likes split ends!), schedule some time to care for your jewelry collection.
With these practical steps, you can confidently create, maintain, and enjoy your bead jewelry. Your collection will not only reflect your style but also tell a story of creativity and care.
FAQs
Q: How can I prevent my bead stringing projects from getting tangled or knotting up, especially when working with thin wires for jewelry pieces?
A: To prevent tangling or knotting when working with thin wires for bead stringing projects, keep your workspace organized by using a bead mat or tray to contain loose beads and wires. Additionally, use a beading needle with a small eye to thread the wire, and consider using beading thread or elastic that is less prone to tangling, while regularly checking for knots as you work.
Q: What’s the best way for me to select and use thread or wire that minimizes breakage while accommodating various bead sizes and shapes?
A: To minimize breakage while accommodating various bead sizes and shapes, select a beading thread that is stronger than ordinary thread, such as nylon or silk, and ensure it has a suitable diameter for the beads you’re using. For wire, choose a gauge that balances flexibility and strength; higher gauge numbers indicate thinner, more flexible wire, which can be easier to work with for smaller beads. Always match the needle’s eye size to the thread and bead sizes for optimal results.
Q: When my bead spacing turns out uneven, what techniques or tools can I use to achieve a consistently professional look in my jewelry designs?
A: To achieve consistent bead spacing in your jewelry designs, consider using a beadboard or design mat with predetermined channels or guidelines to help align your beads evenly. Additionally, using crimp beads or spacers can help maintain uniform gaps between larger beads and provide a more professional finish.
Q: How do I manage the challenge of combining different types of beads (like glass, crystal, or natural stones) to ensure both durability and visual appeal in my finished pieces?
A: To effectively combine different types of beads such as glass, crystal, or natural stones, focus on using a sturdy thread or wire that can withstand varying weights and sizes. Additionally, consider the color palette and texture of each bead type to create a cohesive visual appeal, ensuring that heavier stones are balanced with lighter beads to maintain durability and design harmony.
Q: What are some essential fashion tips for making earrings?
A: For unique designs, consider experimenting with different materials and shapes. Using asymmetrical styles can also make your earrings stand out. Fashion tips for making earrings can provide further inspiration and techniques to elevate your earring designs.